Git Sync Configuration
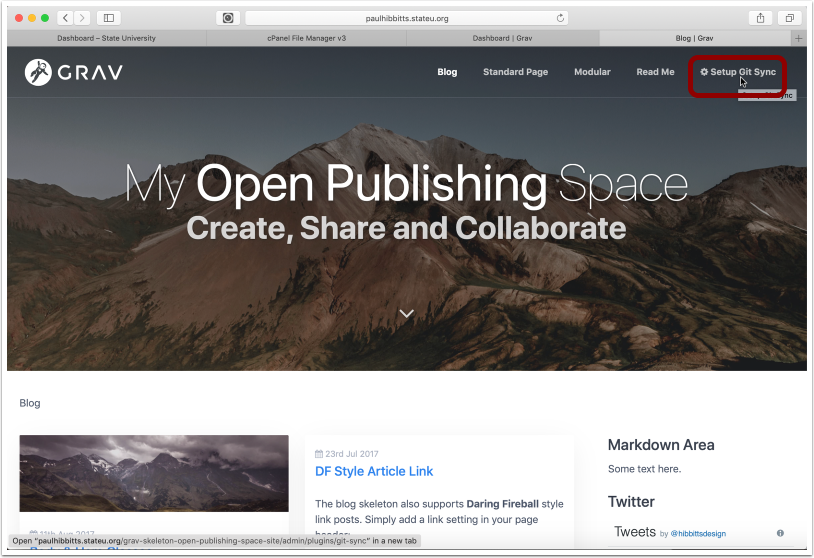
3.1 Tap the "Setup Git Sync Plugin" link
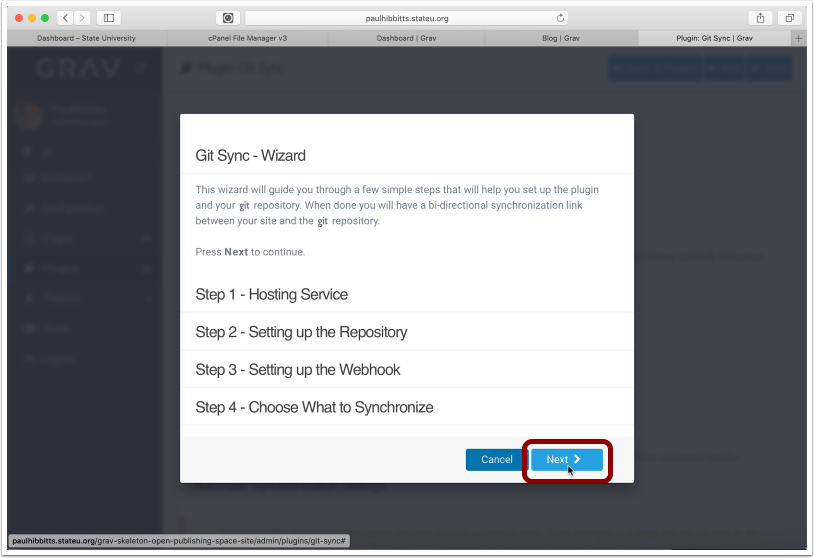
3.2 Tap the "Next" button
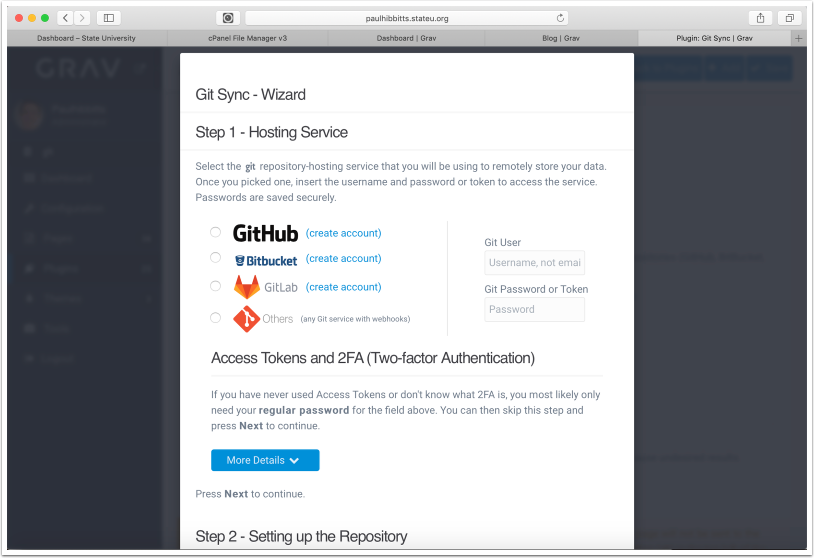
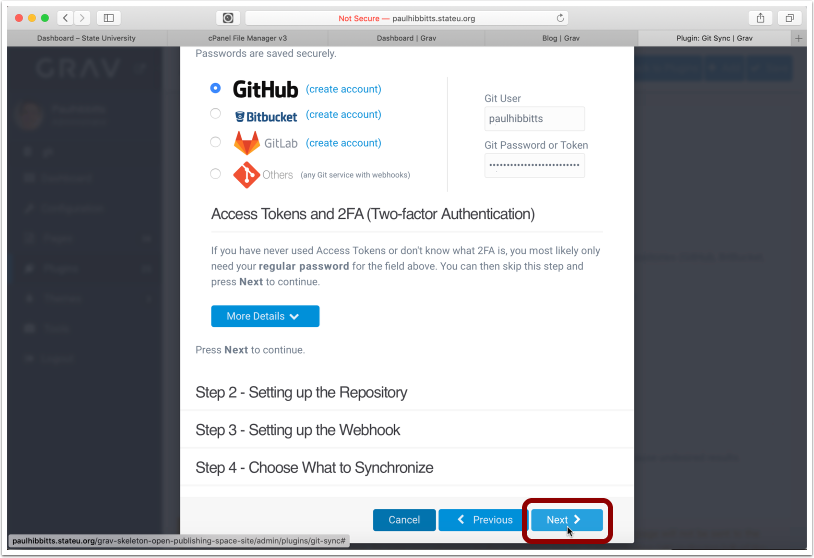
3.3 Choose Git service and enter your username and password for it
3.4 Scroll down (if needed) and the tap the "Next" button
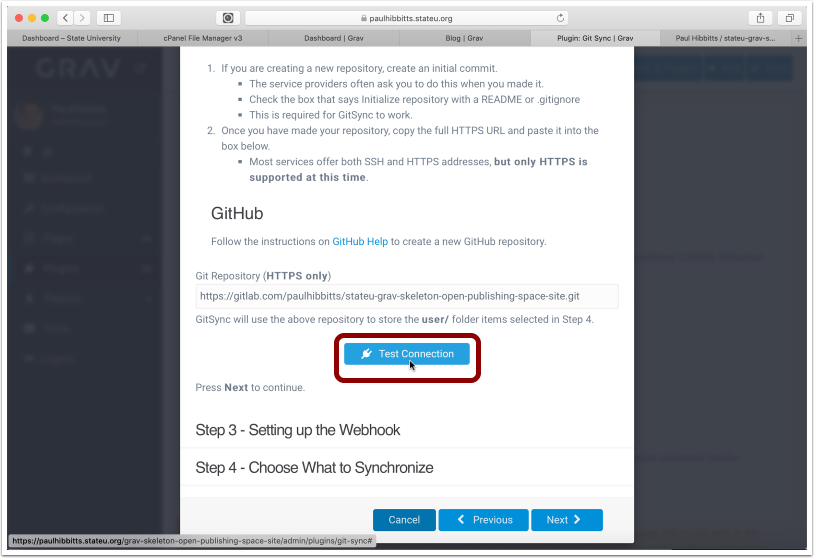
3.5 Before continuing, you will need to create a repository on your Git service.
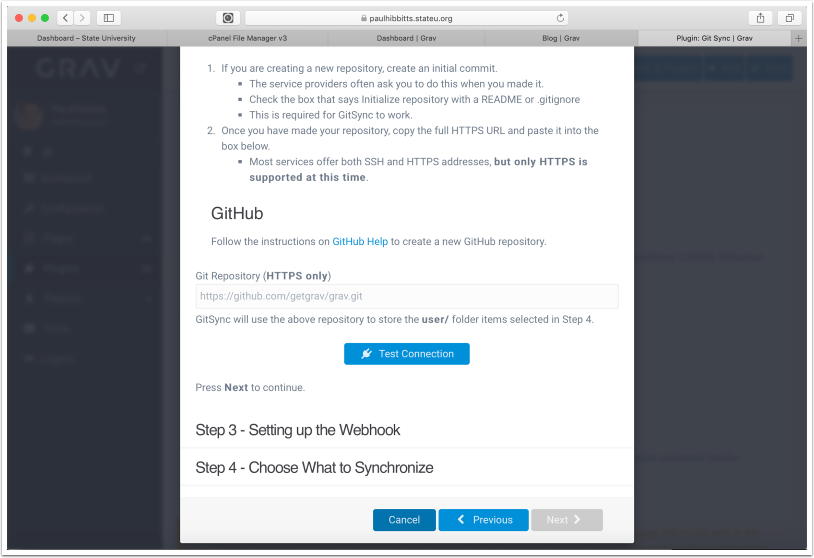
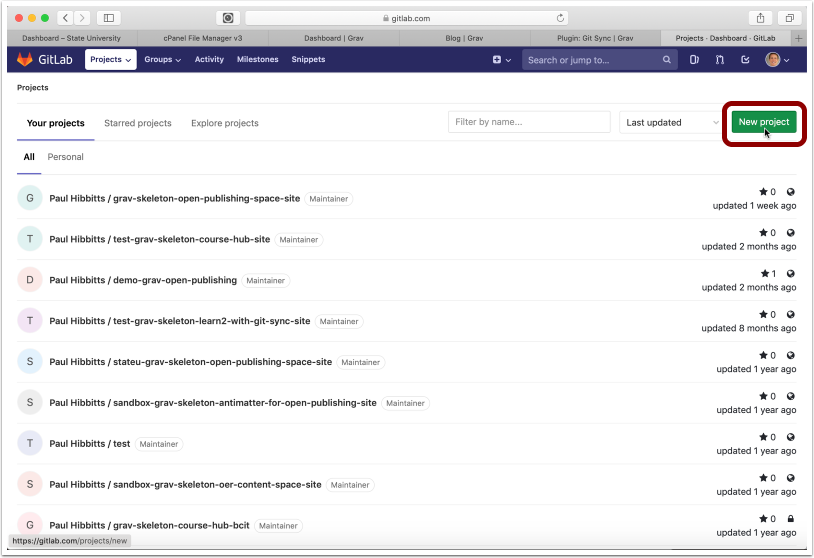
3.6 Create a new repository in your choosen Git service (GitLab example shown)
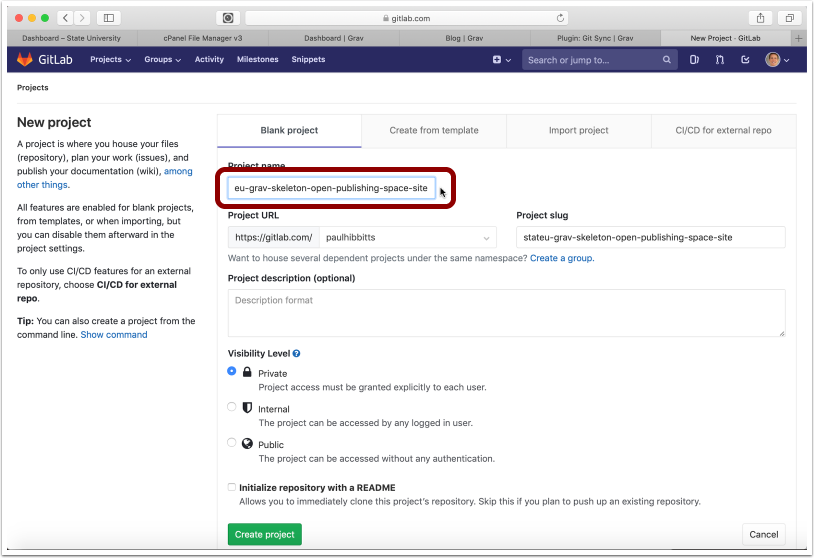
3.7 Enter project (repository) name
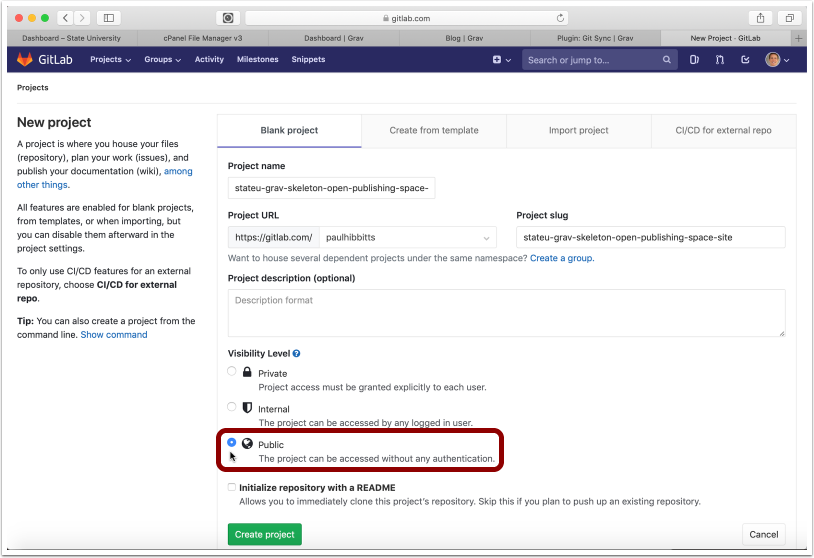
3.8 Tap "Public" to make the repository publicly available
3.9 Tap "Initialize repository with a README" to include a ReadMe file
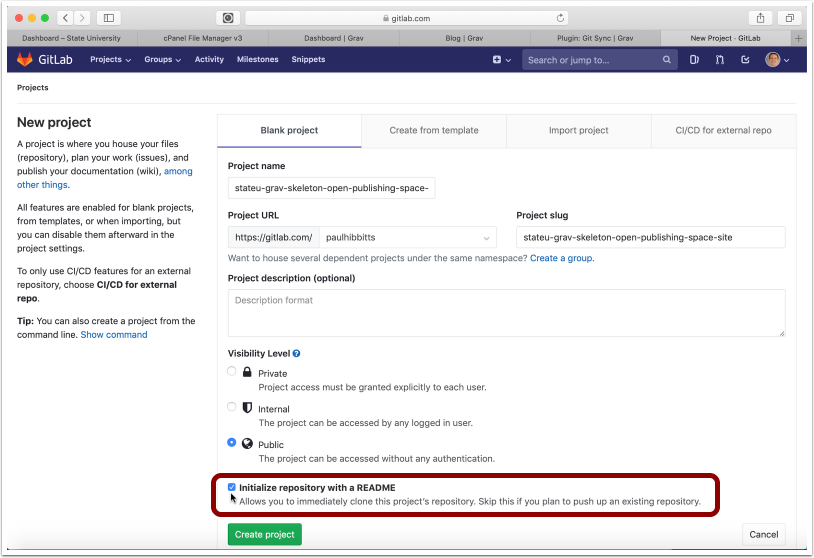
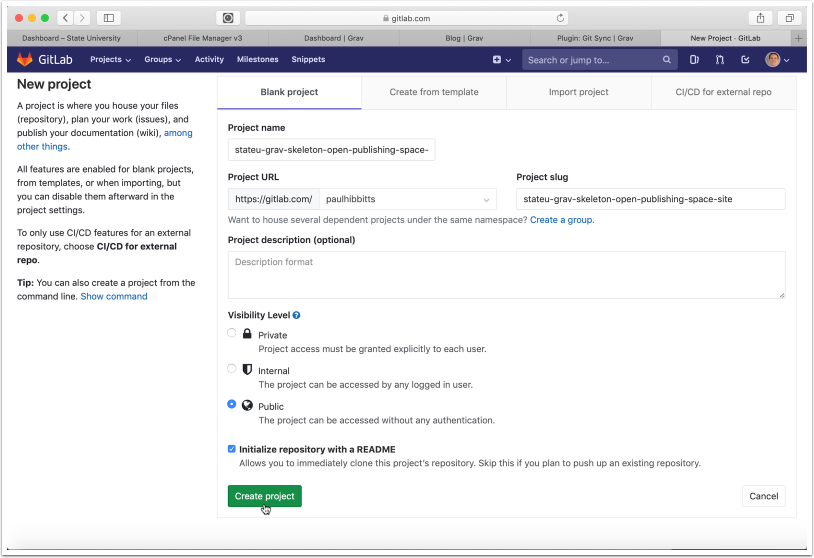
3.10 Tap "Create project"
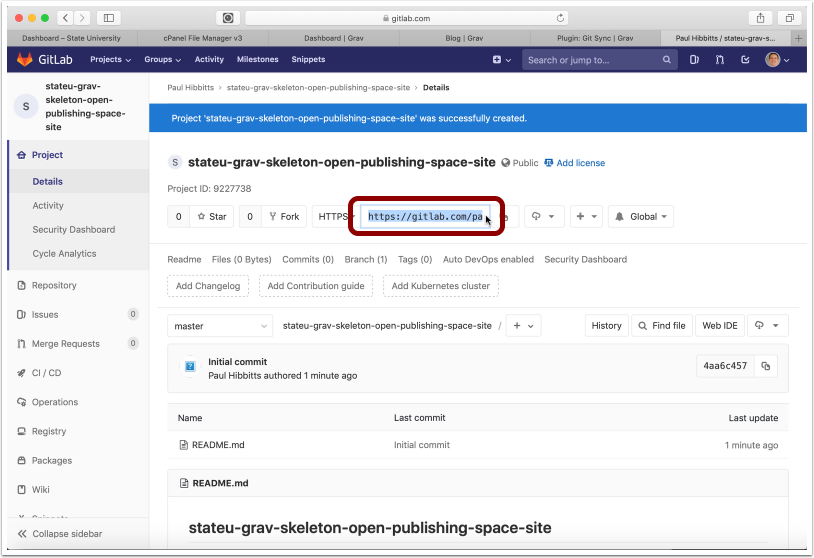
3.11 Tap on the "SSH" menu button and choose "HTTPS"

3.12 Copy the HTTPS URL of the repository to your clipboard
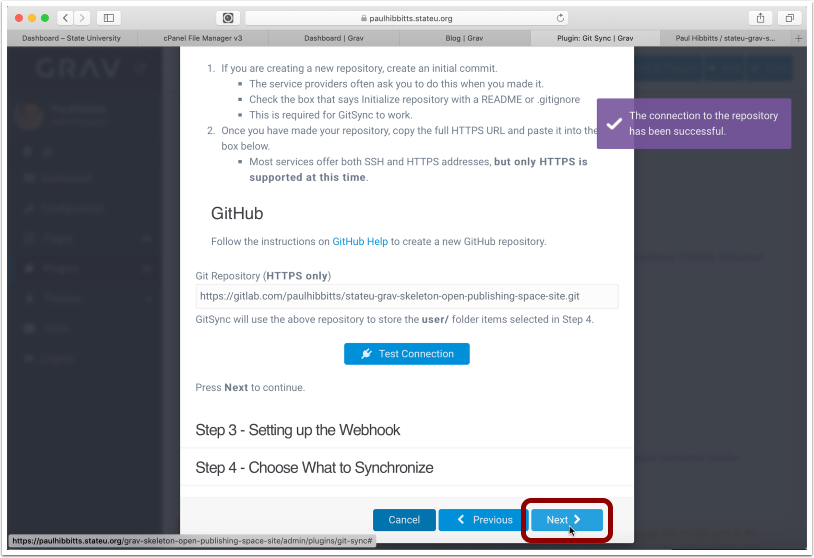
3.13 Paste the Git repository HTTPS URL into the "Git Repository" field and tap "Test Connection"
3.14 Tap the "Next" button
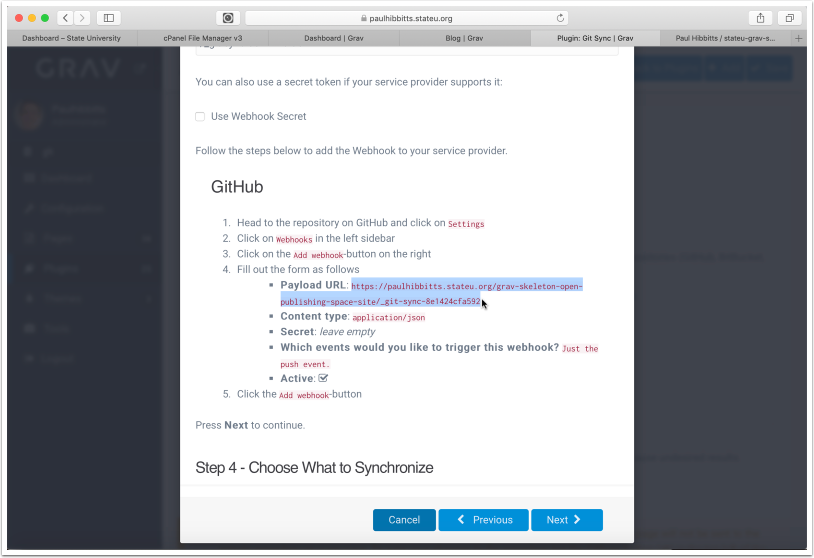
3.15 Select the displayed Webhook URL and copy it to your clipboard
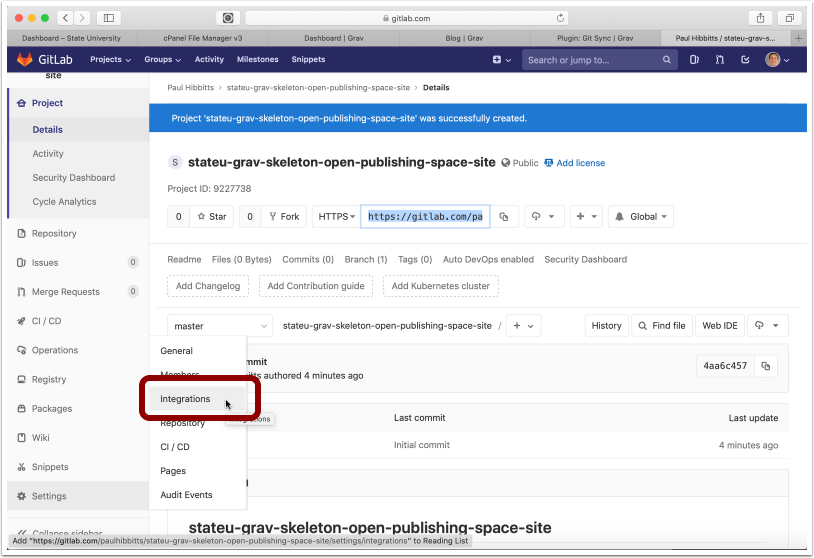
3.16 Tap "Integrations" in the "Settings" menu
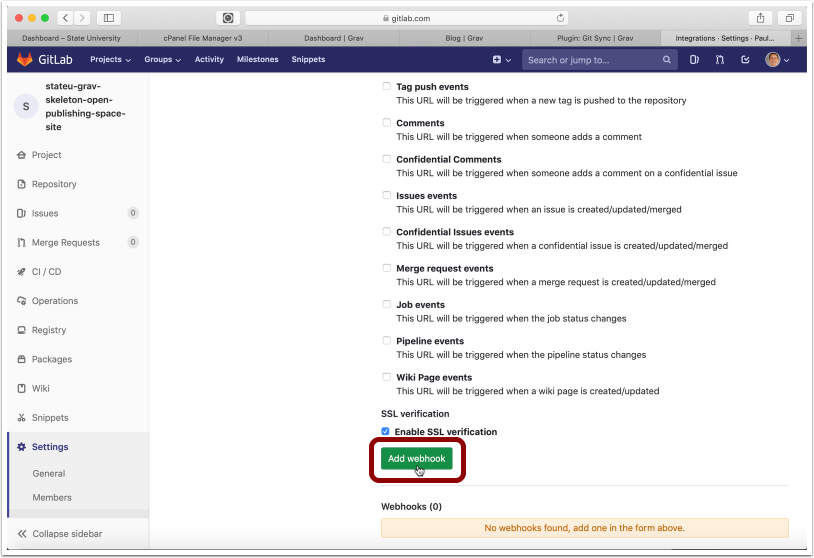
3.17 Paste the copied Open Publishing Space Webhook URL into the "URL" field
Note: if you change the folder name or location of your Grav Open Publishing Space site you will also need to update the "URL" field
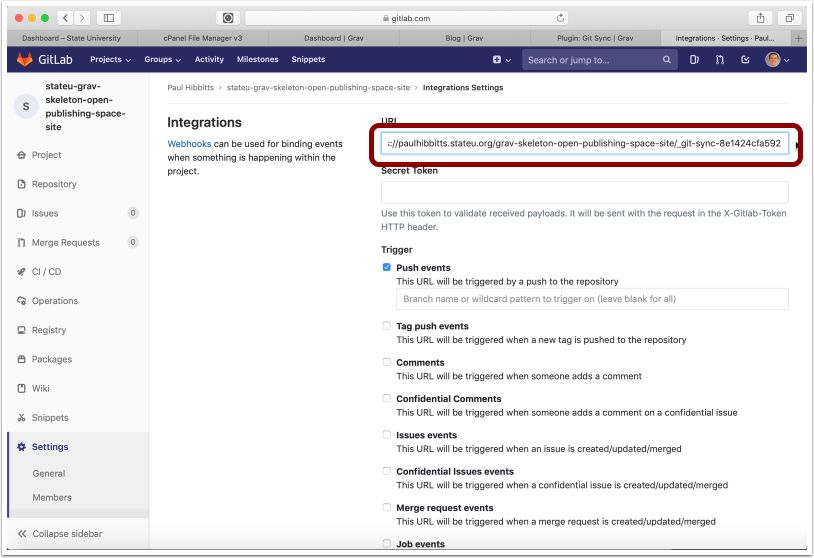
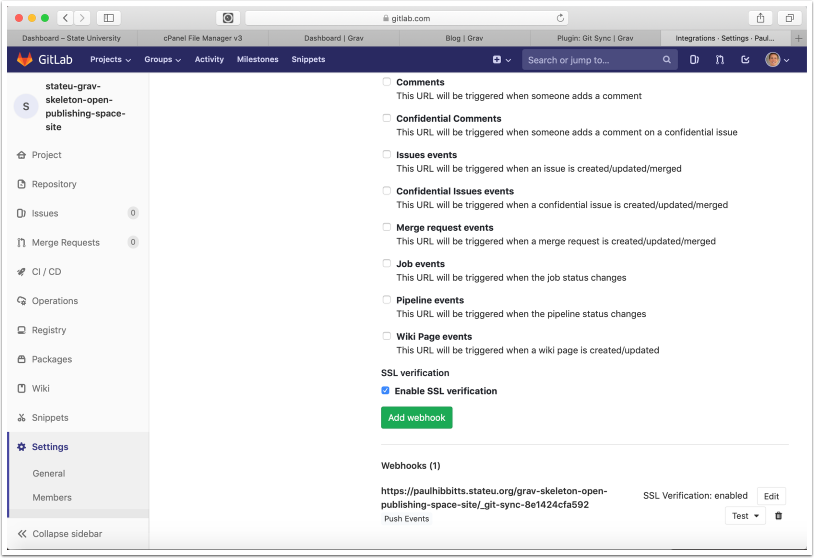
3.18 Scroll down, and tap "Add webhook"
3.19 Once the new Webhook is displayed, return to your Grav Open Publishing Space site
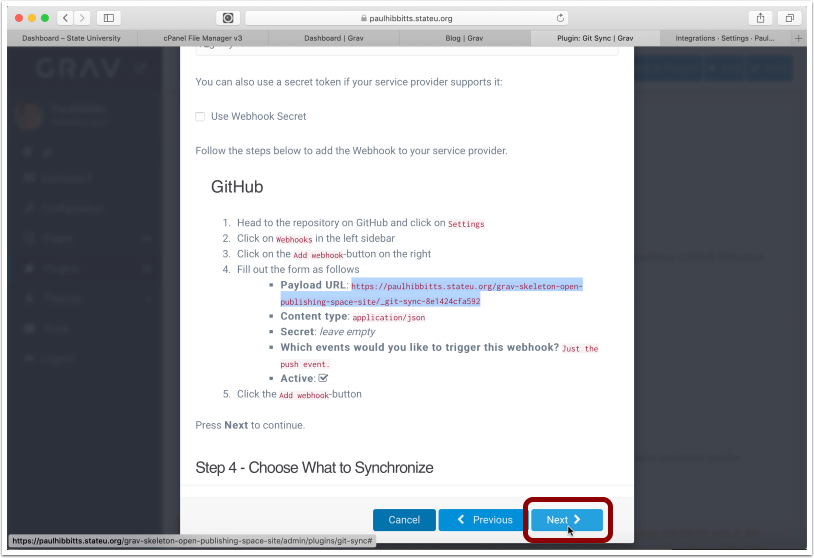
3.20 Tap the "Next" button
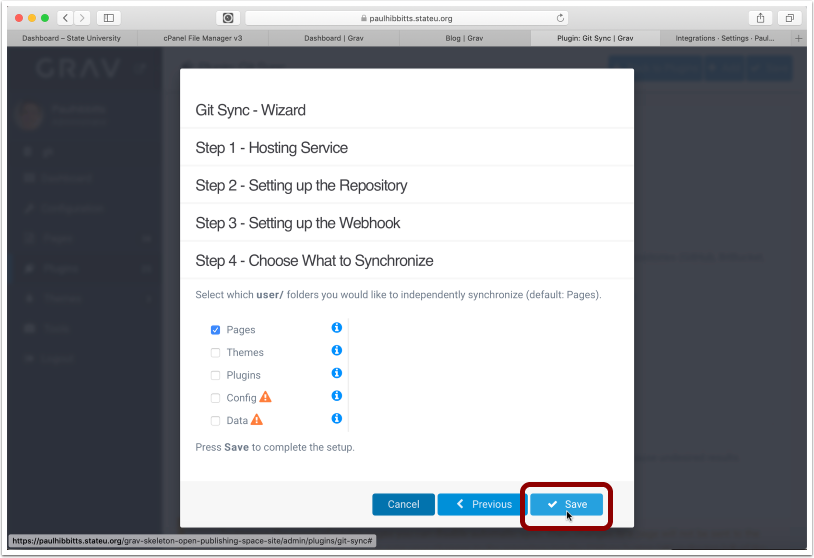
3.21 Tap the "Save" button
Note: you can also choose to sync other user folders here, and as well in the plugin configuration panel
3.22 Tap the arrow-square button to once again preview the site
![]()
3.23 To test your Git Sync configuration, tap on the "View Content Repository" link
Note: you can change this link to also go directly to the displayed page in your Active Theme settings

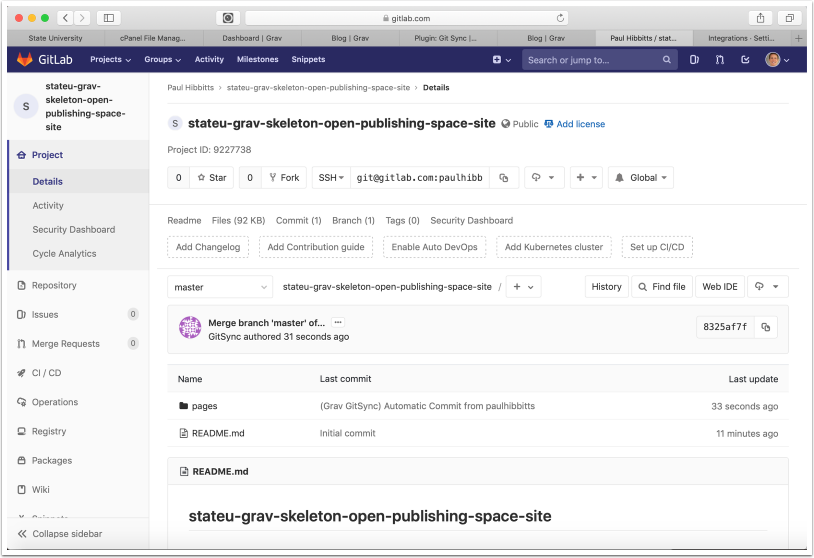
3.24 The site Content Repository should now be displayed in GitLab
Notice an error? Think you can improve this documentation?
Edit this Page